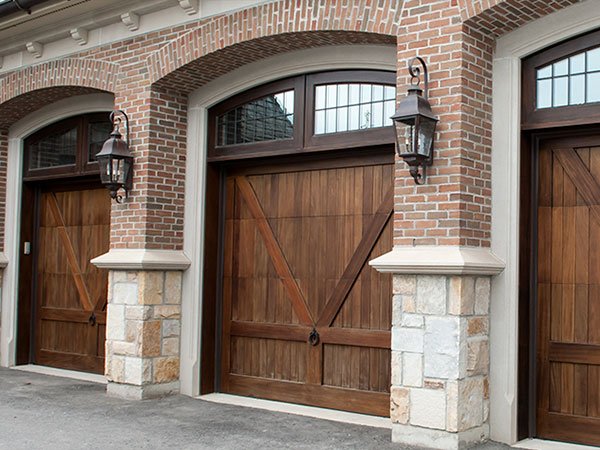
Staining protects your garage wooden doors from harsh weather and also prevents your doors from being fed on by insects like ants. Wood staining is the best solution for longer lasting garage wooden doors. Staining your door brings out that next level fabulous and rustic look, adding some style to your home. Here are a few steps to staining your garage doors without major hiccups in this project:
1. Start with cleaning your surface
Start with cleaning your wooden garage door, always use high-quality wood cleaning products. When cleaning your door you might come across moss or mold especially if your garage is exposed to a lot of moisture. Clean your door gently, to avoid ruining it. If your wood is only exposed to a dust then it’s much easier to clean.
If you are working on a new door, clean and sand the wood to make it look much smoother and professional, as it also makes the stain to stick easily to the doors while being applied. If you are using a pressure washer, reduce the pressure to 1000 or 1500 psi or even less.
2. Gather your tools
Have everything you need organized and in perfect condition ready for the job. You will be needing a pressure washer, fine grit sandpaper for the wood, tsp substitute, a painting apron, short and long handed paint brushes, a stain sprayer, plastic sheets to protect unstained areas, few rolls of painters and masking tape.
3. Prepare your surface
You have already cleaned the doors and gathered your tools. Make sure your surface is dry, this will make applying the coat to be as easy as it needs to be and protecting the wood even better. If your wood comes from cedar or redwood tree, you might want to think about brightening it. Cedar and redwood have a tendency of darkening once they are disturbed. These types of wood tend to darken unevenly which doesn’t end up looking very neat and professional.
You can look for products that will neutralize the tannins as this restores the natural color of the wood. Before you start with the staining process you must cover the places that you do not intend to stain like the flower bed with the plastic sheets. The product that you will be using for these projects might be harmful to the plants. Also, cover your windows and walls, you don’t want to keep cleaning after your mess when you finish your project. Use the masking tape to cover the door handles and other wall fixtures.
4. Apply the stain
As always, make sure to choose a high-quality stain so you’re newly stained wood garage door will last longer and look professional. A penetrating oil-based wood stain is usually the best. You can use a brush, roller or air-sprayer. Mix the stain thoroughly before starting, this makes the streaks to be uniform while applying.
Generally, applying the stain gives you the best chance of getting a significant amount of the stain to penetrate to the wood easily which is the ideal solution for longevity. Remember to back brush the stain immediately after it’s applied, this helps even out the stain and it really adds the overall appearance of the finished product.
Make sure to push the stain into all the depressions and uneven surface areas. You must work fairly and quickly during this time so you can spread the stain before it dries. It is wise to consider beginning with the places that are not getting any direct sun because the stain dries quicker when exposed to the sun. Add a second coat when the first coat is completely dry for maximum protection.
After repeating the same process, apply a clear coat. This will preserve the wooden door and make it to look professional. In this process, it is important to choose the coat that won’t entirely seal the wood because the wood needs to breathe a little. Don’t apply the third coat unless the second coat is dry.
Conclusion
A well maintained wooden garage door looks beautiful, you can easily achieve it through these steps that I have mentioned above. I wish you all the best of luck with this project. And as usual, if you need any help with your garage door refinishing, we will be more than happy to help.


